Two months ago I approached the Wichita Children's Home, inquiring about a potential opportunity to volunteer in their arts program? As of right now, the Children's Home has no established art program in place. The staff members were excited in my interest and encouraged me to begin an arts activities program with teenage females in a temporary resident situations at the Home. I accepted the chance to do so and I now share up to 4 hours per week with the girls. I am now called "Miss Sarah."
Since I see new faces each night, I have designed projects that I repeat each time I am there.
There is an expressive and therapeutic art element to each project for the girls, myself, as well as the staff. I am thankful for having such an incredible opportunity to share my life with these amazing young teens.
Enjoy the post!
Sarah
THE JOURNAL PROJECT at the WICHITA CHILDREN'S HOME
EXPRESSIVE MARK MAKING
The first projects requires them to aggressively and expressively attack a large, 16" X 24" sheet of white paper that they have attached to a large, masonite drawing board, with a graphite stick and one crayon that is either their favorite color, or one that depicts the color of their mood. I give them 3 minutes max for this exercise. The girls then remove their drawings and are instructed to shred the drawing into as many pieces as they can within one minute. These shreds are kept in a pile and can be used in the final project.
POCKET-SIZED JOURNALS
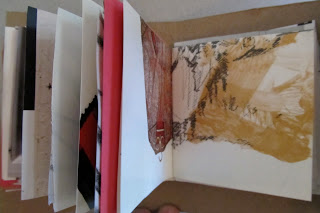
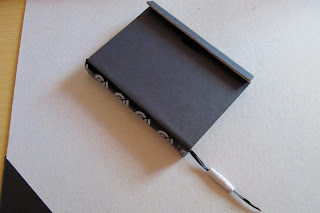
The following images below are taken of journals created by the girls in the Children's Home.
We use chipboard from cereal boxes as our covers, collage the covers with inspirational images, text, and and add little touches like ribbon bookmarks and velcro latches.
DIY HEALING JOURNALZ
DIY HEALING JOURNALZ
Step-by-Step Instructions to make your own journal at home.
MATERIALZ
Chipboard into 3.5" x 7" pieces for journal cover.Paper cut in 3" x 5.5" pieces
Stapler
Collage materials; i.e. old magazines, stickers, books, etc.
Glue stick
Scissors,
Exacto knife
Knitting needle, (optional for paper beads)
Mod Podge
Paintbrush
Make a Mark at 1" down from the top of your chipbord at 6" from the bottom
Fold Bottom of Chipboard to where it meets that mark and bend.
Now fold 1/4 of an inch on either side of the center fold to create a spine.
Bend the top of the chipboard at the 1" mark inward.
Bend once again in half. This creates the latch on the journal.
NOTE
When gluing in your paper inserts, do NOT glue in the spine section on the inside of the cover.
If you do, your book will not open or close properly.


